Have a plastic pot that doesn't drain water? It's an easy fix! Here's how to drill holes in a plastic pot for drainage!
Drainage is one of the most important things to potted houseplants.
A soggy plant will get root rot and eventually die.
The best solution is to add drainage holes to the bottom of your plant. Many pots come with drainage holes in them, but some do not!
Why are drainage holes so important?
All plants have different needs, but no plants want soggy roots.
When you water plants, water usually settles down to the bottom of the pot. Sitting water can lead to mold or rot.
Drainage holes allow excess water to drain on out and will keep your plant and soil from getting soggy.
Should I drill holes in the bottom of my planter?
Drilling holes in the bottom of a pot is an easy way to add drainage. If there are holes - assuming they aren't clogged by anything - there's no way that your plant will get water logged.
However, drilling holes in your pot is not the only way to add drainage to a plant pot.
Ways to add drainage to a pot:
There are 3 main ways to add drainage to your potted plant.
- Double pot
Place a pot with drain holes (like the plastic nursery pot a plant comes in) inside a larger pot. Water can dribble out the inner pot and it won't get soggy. - Add pebbles to the bottom
Adding a layer of small rocks or pebbles creates open air space where water can settle, but your soil won't get soggy. - Drill holes in your planter
Drainage holes let excess water flow right out.
Beware if you have indoor house plants - put them on a saucer or drip tray if you drill holes in your pot or you risk a soggy shelf or floor!
How to drill a hole in a plastic pot
Supplies needed:
- Diamond drill bit for large holes or a super hard pot. Sharp twist bit for regular plastic pot (see my guide to drill bits for each pot type below)
- Cordless drill
- Plastic pot
- Safety glasses/safety goggles
- Awesome plants!
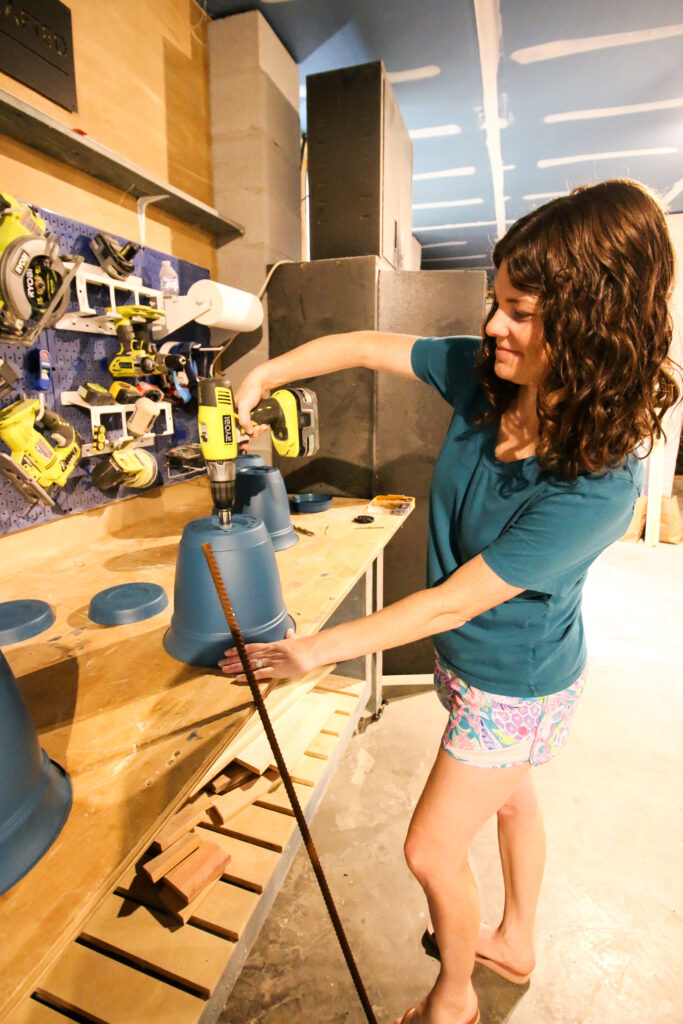
How to drill a plastic pot
STEP 1: Get the right drill bit
If you have a very hard plastic pot, you will need a diamond drill bit to drill through it. These are also sometimes labeled as masonry drill bits.
This is a bit designed for drilling into tile - kind of like a wet saw.
It sounds fancy but they are inexpensive and usually come in a 5 pack online or at most hardware stores. They will fit any standard drill.
You can use a sharp twist bit on thinner plastic pots, however, they might have a tendency to crack the plastic a bit more.
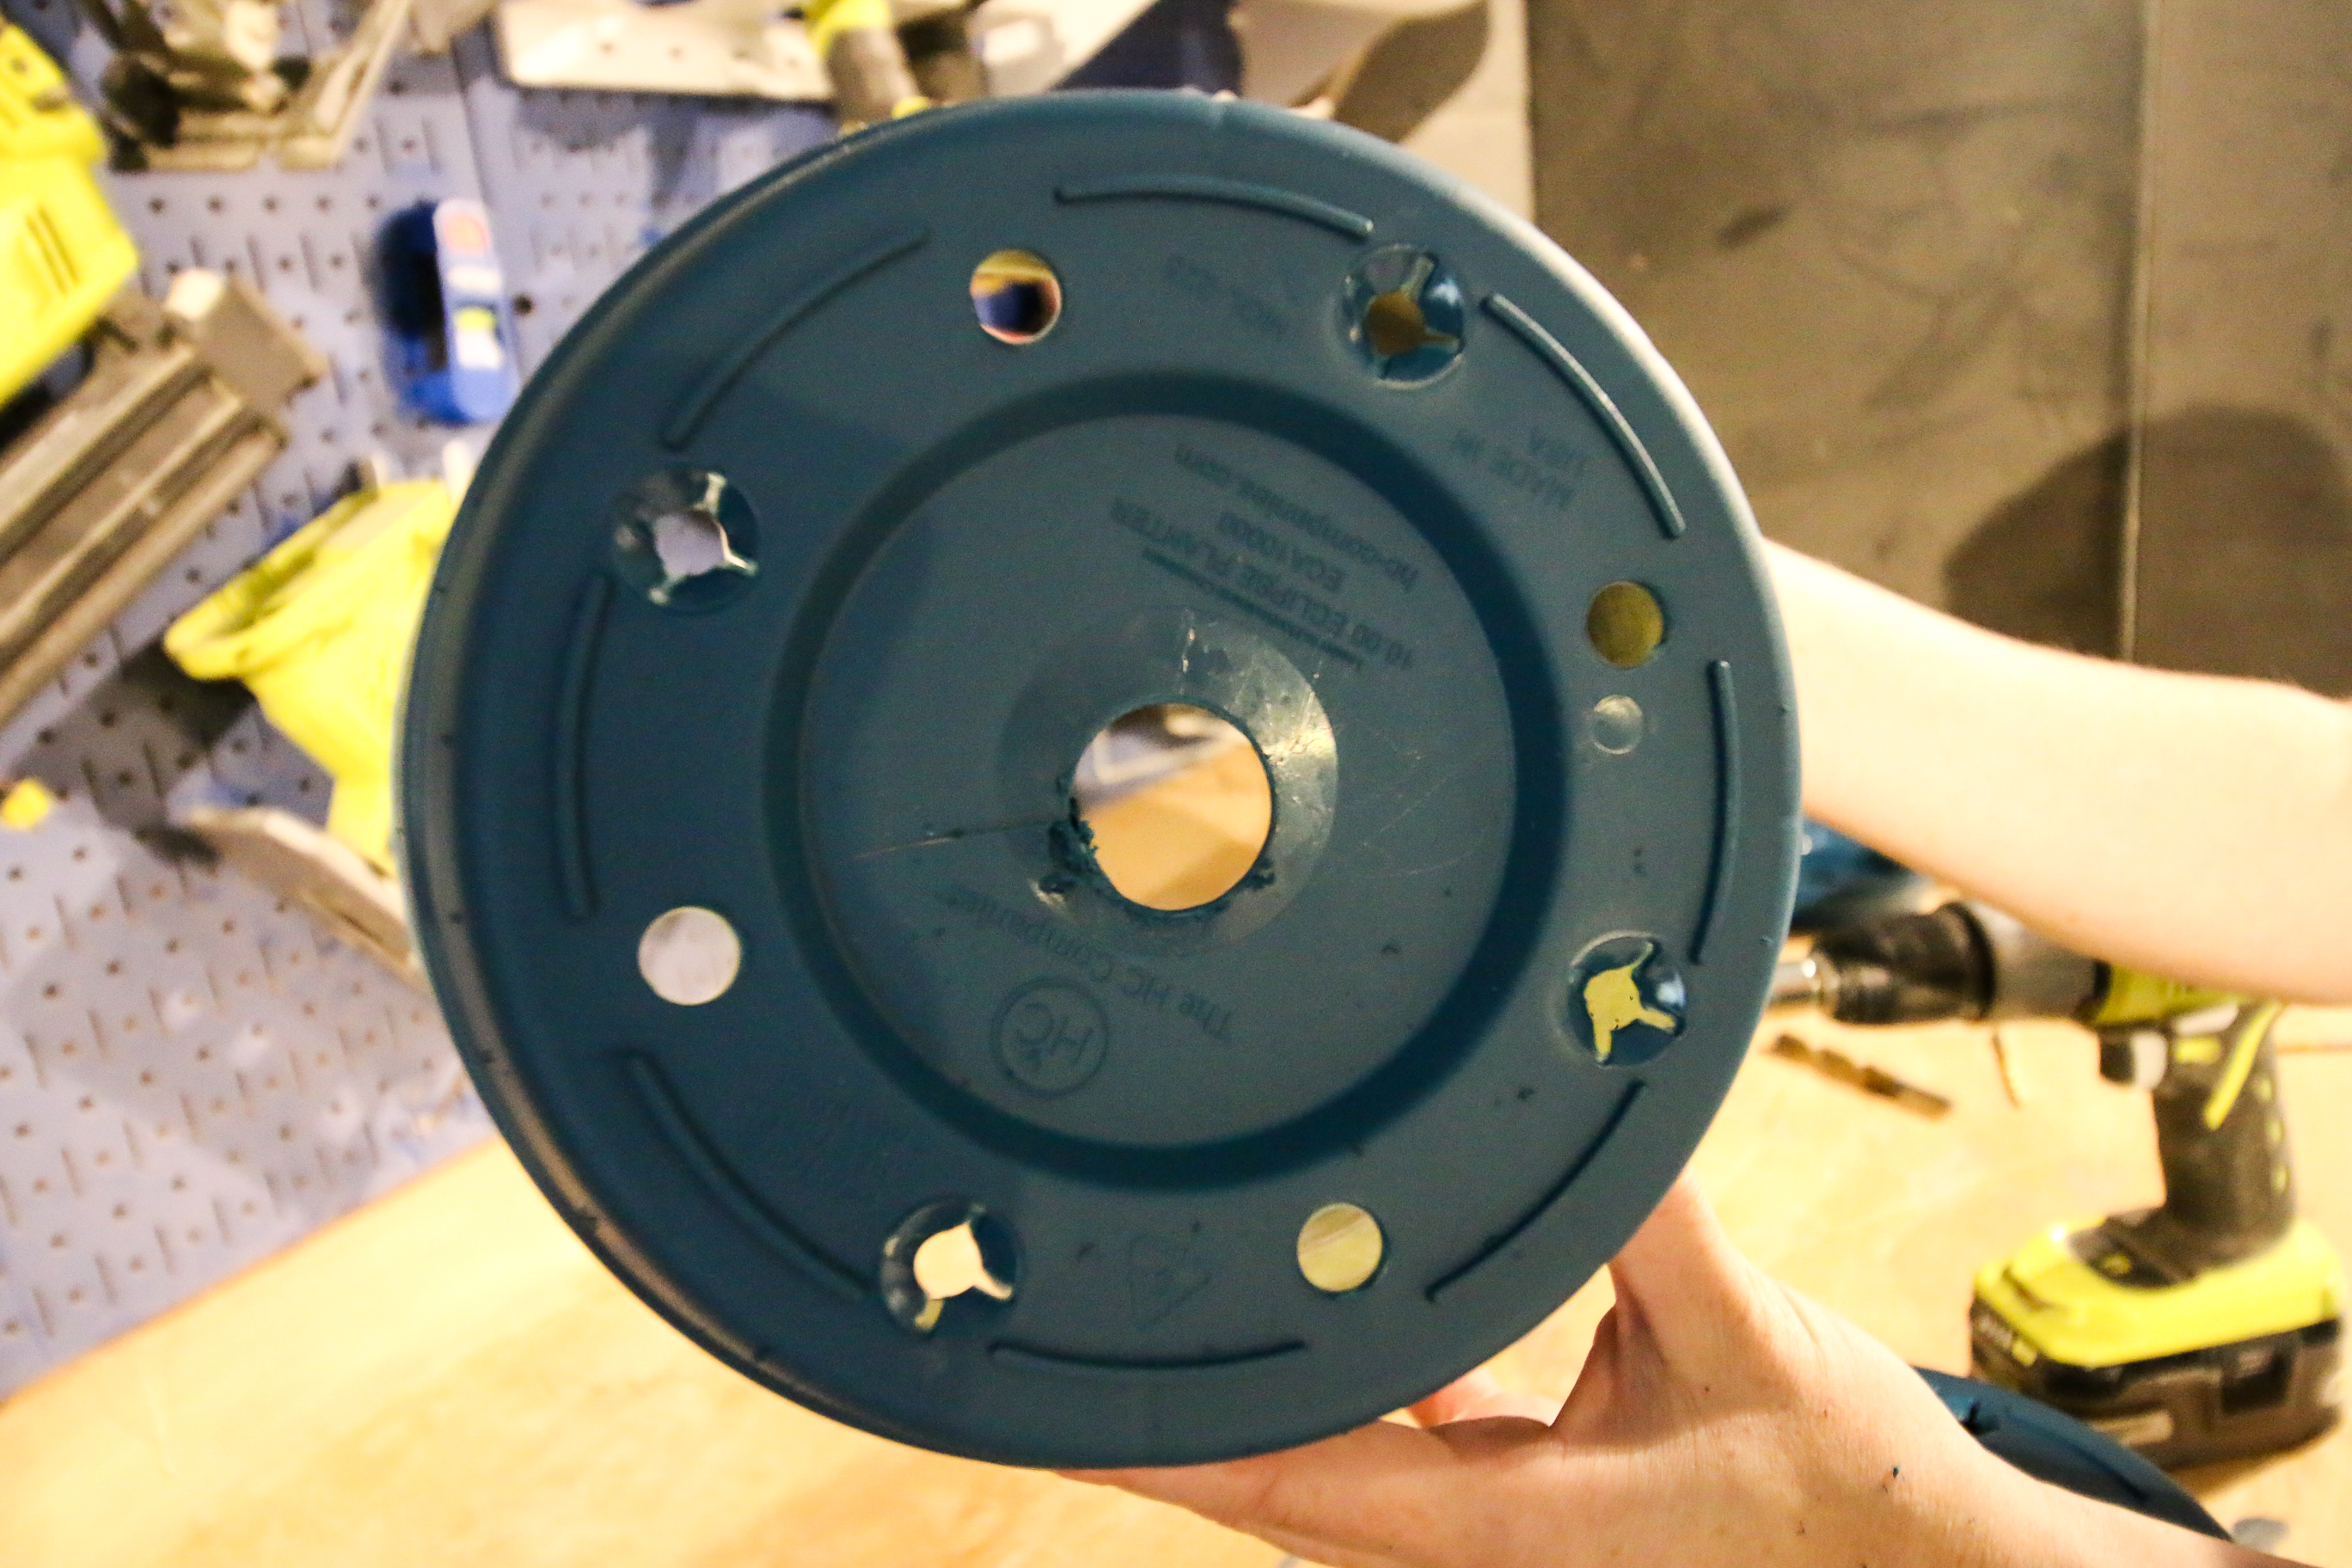
STEP 2: Prepare the pot
A lot of plastic pots have these built-in drip trays at the bottom. This is great and can help to prevent root rot, but it's not as good as a drainage hole.
If I am drilling holes in the bottom of a pot, I go ahead and pop the drainage tray off. It should snap off easily with your fingers.
Don't worry about breaking it - once you remove it, you won't need it any more.
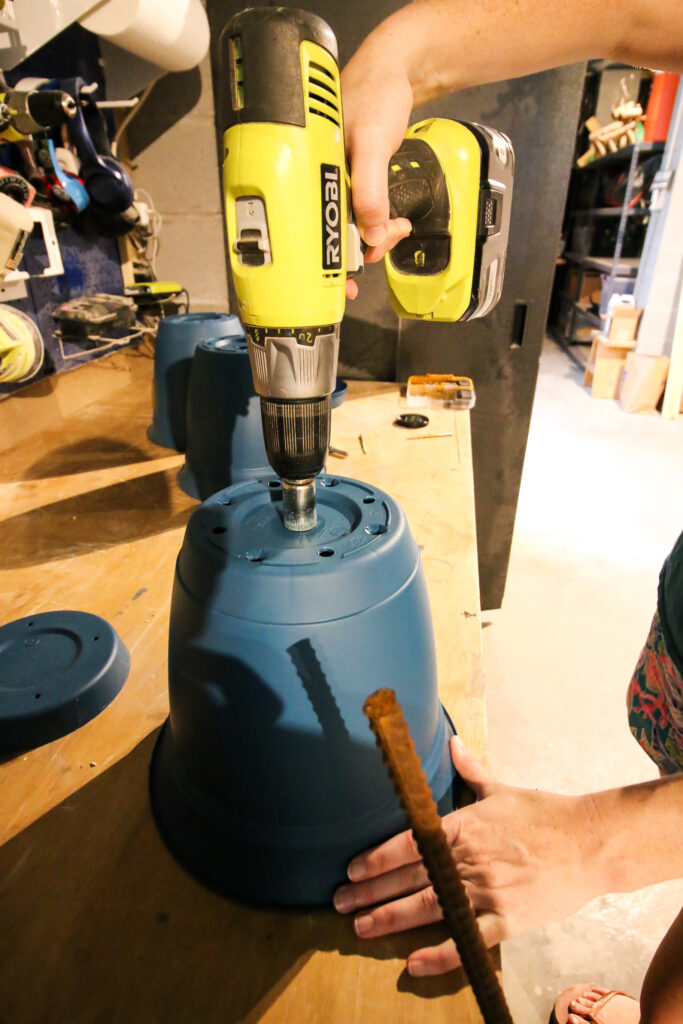
STEP 3: Flip the pot upside down
Place your pot upside down on a table or flat, secure surface.
I suggest having a second person to hold the pot firmly in place while the other person drills.
Otherwise, these have a tendency of spinning on the drill!
STEP 4: Drill in
If you are using a diamond or masonry drill bit, you can drill right in. Decide if you want to do one hole in the middle or several around the pot.
If you are using a twist drill bit, I suggest starting with a smaller size, and then slowly working up to a drill bit the size of your final desired hole.
Sometimes, if you go straight for the large hole, you will get cracking. Working your way up helps to prevent this!
STEP 5: Add your plant
Add your plant and fresh soil to the pot. The drainage holes should give it proper drainage, but you can choose to add small pebbles below the soil if you like. Just be sure they are big enough to not fall thru the hole you just drilled!
If you plan to keep your pot indoors, add a drop tray underneath to avoid extra water dripping out onto your tabletop.
Types of drill bits for each type of pot:
This process works the same on any kind of pot, you'll just want a drill bit that will easily drill through each material!
| Pot type | Drill bit type |
| Terra Cotta & clay pots | Diamond drill bit/masonry bit |
| Ceramic tile | Diamond drill bit |
| Plastic pots | Sharp twist bit |
| Metal | Cobalt steel bit |
| Thick Glass | Diamond drill bit |
How many drainage holes should I add to a pot?
Any pot over 8 inches in diameter I like to add 2 holes to, just to be sure water isn't pooling on one side.
For one hole, drill it in the center, for two or more holes, instead drill them halfway between the center of the pot and the edge, for increased stability.
You don't want 2 holes too close together or it could compromise the strength of the plastic in between them.
Video demonstration
Watch my video for a full step by step demonstration of how we drilled drainage holes in our pots.
Thanks for reading!


Hey there, I'm Morgan, a houseplant enthusiast from sunny Charleston, South Carolina. Growing up surrounded by my mom's lush orchids and African violets, I discovered the magic of bringing nature indoors. Thanks to the pandemic, I delved deeper into houseplants, discovering their power to uplift moods and transform spaces. I'm here to spill all my secrets, helping you pick the perfect houseplant - and make it happy. Let's keep your plants alive, together! 😊